My best friend, Rachel, recently turned 25 and we went to dinner tonight to celebrate her birthday. I wanted to make a fun cake for her and finally decided on Bejeweled Blitz - a facebook game that we both play! Since lots of people ask me just HOW I make my cakes, I thought I would show the process!
First, I almost always use a cake mix. People always tell me how amazingly delicious my cakes are, so why bother making them from scratch? Also, I don't have to wonder how they will turn out because everything is so consistent. My favorite brand is Betty Crocker and I love the French and Golden Vanilla the best. Yummm
You might not be able to tell in this picture, but I always line the bottom of the pan with wax paper. If you don't do this, DO IT! I made cakes for a year or two before I realized how wonderful this step is! Now I never have a cake stuck in the pan!
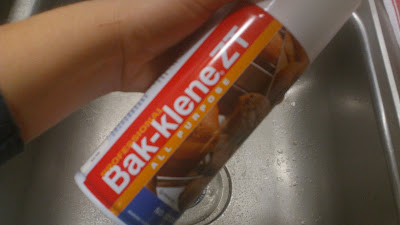
Also contributing to my non-stick success is THIS stuff. I spray the sides of the pan with Bak-klene and this stuff is wonderful! You can pick it up at Williams-Sonoma, but I'm sure other retailers carry it, as well.
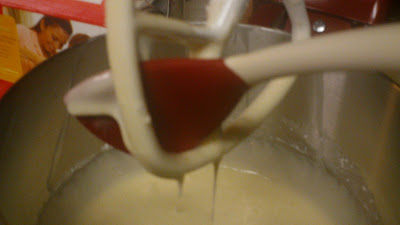
Also from Williams-Sonoma (am I commercial for them today or what?), this spatula is great! I guess you call it a spatula? I'm not sure. ANYWAY, the reason I love it is because it fits into all the openings of the KitchenAid beater attachment (seen below). It also has a curved handle so that you can scrape down the sides of the bowl without lifting the arm of the mixer. How genius is that?!?!
Mmm... cake batter...
Next, I started making fondant pieces for the top of the cake. This was way more time consuming than I had planned! It was fun, though. I did it by making grids in the fondant, painstakingly measured to 3/4 inch squares, then shaped according to the game gems.
Here you can see the grid I was talking about!
After that was done, I started stacking and icing the cake. Yummmm, look at all that buttercream. Oops, forgot to get pics of making the buttercream! I usually make a non-butter version - 1 cup of crisco mixed with 1 tsp of vanilla, add 4 cups of powdered sugar a cup at a time, then about 5 TBL of milk. I don't measure the milk anymore, just pour until it is the consistency I want. It's also good with 1/2 vanilla and 1/2 almond extract.
You know how you can sometimes see the seam between cake layers, slightly sticking out farther than the rest of the cake? The way to avoid this is to smoosh. Yup, stack them up and smoosh them down with your hand. If icing oozes out the sides, you can just run a knife around the cake the scrape off the excess.
Next, I iced the cake. You don't have to worry about making it perfectly smooth because the next step is smoothing it using the paper towel method.
In order to smooth the buttercream, you have to wait until it "crusts." Crusting just means that the outside surfaces slightly harden to the point that you can touch it and it won't come off on your hand. Most websites will tell you 10 minutes, but it seems to take a bit longer for me. I usually find something else to do for about half an hour at least. After it crusts, get a VIVA paper towel. The reason you need that brand is because it is the only brand that doesn't quilt. If you want a quilted pattern on your icing, than by all means, use whatever brand you want. :) I love Viva, though! Just rub your hand over the cake in a circular motion. Make sure you pick up the paper towel and move it around frequently to make sure nothing is sticking.
After it was all smooth, I started assembling the board. I was afraid that I would make an inaccurate board, so I played the game a few times so I could get some good screen shots. (Side note, in the end it doesn't matter because no one even looked close enough to make sure the board was playable! haha)
Here is the board, finally assembled. Now on to the details!
I added a simple border around all the straight edges and also added the time bar that tells you how many seconds you have left in the game. Since it was her 25th birthday, I made it look like she only had 25 seconds left. I thought that was fun. :) Here is the finished product!
Sorry my pics are so bad. My next "want" is a good camera!! :)


What a fun cake! Love it!
ReplyDeleteWhat an awesome cake!!!! Ummm...so my birthday is in two weeks. I think you should come up to OK and make me one of your fabulous cakes.
ReplyDeleteThat looks both delicious and very accurate! Bravo!
ReplyDeleteI loved it!! and while I was getting ready this morning a certain 2 year old got in the fridge and ate ALL of the bejeweled pieces!! So now its just a grey cake! hahaha
ReplyDeleteYou can't beat VIVA!!
ReplyDeleteThis is the most amazing cake I have ever seen! Great work! :)
ReplyDeleteLove it!
ReplyDeleteGood Work, That looks great!
ReplyDeleteWow, how awesome. Thank you so much for the tips.
ReplyDeleteThank you so very much for that fun cake. I try and do cakes but not very good at it but I will think about this one the next time I have a cake to make for somebody's birthday. Keep up the great work.
ReplyDeleteThanks
Helen C, Ontario Canada